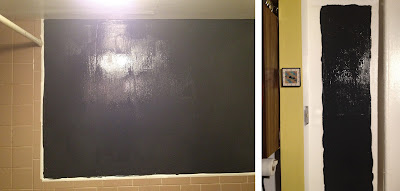
The first step is cleaning and prepping your surface. I recommend cleaning your walls with a bit of vinegar on an old rag. Vinegar is great for cleaning as it is effective and non-toxic. To prep your wall, remove any hardware - we removed the towel rod in the bathroom - and fill any holes with plaster.
If you are wanting just a section of your wall to be a chalkboard surface - like we did near our kitchen - your next step will be taping off the portion to be painted. The trick to getting very clean lines of your taped off section is to first paint a layer of your wall color. This prevents the new color from seeping under the tape and causing an uneven line.
If you are painting a full wall - like we did in the bathroom - you will also want to tape around the edges. Since the chalkboard paint is black, any mistake you make will be obvious!
Now that everything is prepped and taped off, time to paint! We did two coats of the chalkboard paint to make sure that everything was covered. Give the paint a good 24 hours to dry properly before peeling off the tape. If you are painting in the bathroom, try to avoid steaming up the room before the paint is fully dry.
Time to break out the chalk! Its best to work from top to bottom of your wall to avoid smearing the chalk. I decided to create a chalk museum of fine art in our bathroom - what better place to encourage creativity!? I looked at some inspiration of vintage typography and just went for it drawing a banner and some embellishments. If you make any mistakes, don't worry! The genius part of chalk is how easy it is to remove. To prevent any evidence of your mistake, dampen a cloth with a bit of water and wipe away the chalk and start fresh. To correct any small mistakes, I used a wet cotton swab.
To create the chalk frames, I used a variety of objects I found around my house to trace around. I found that plates and platters were about the right size and easy to trace around. I used a variety of sizes and shapes for visual interest - circle, square, rectangle, oval - or whatever you may like! Then I embellished the shapes with dots, flourishes and other lines to make them look like frames you might see in an art museum.
Finishing up the kitchen chalkboard was a much simpler process. I just wrote 'Groceries' along the top and then started my grocery list. Now what to do with the rest of my chalkboard paint...hmmmmm!


This comment has been removed by the author.
ReplyDeleteYou know I love it!! The banner and your handwritten 'type' is so on-point, I want to make my own! Surely you've seen the work of Dana Tanamachi (http://www.danatanamachi.com/chalk/) I DIE!!
ReplyDeleteJust one question: did you use some sort of 'fix' for the lettering/frames that you would like to keep pseudo-permanent?
I can't wait to see what else you get up to, I'm so glad you're back to sharing projects. I'm always so inspired by all that you manage to get done!
I have seen that artists' work and many of those images were part of my inspiration for this project - but I didn't realize it was all the work of the same artist! Thank you for sharing :)
ReplyDeleteI did not use any fixative - for right now , we want to be able to change it all on a whim. Although, it will be interesting to see how well the chalk stands up in a humid bathroom environment. All part of the great experiment!
Ever since I discovered chalkboard paint, I've been like a little kid with it! We painted my husbands entire art desk!
ReplyDeleteSuch a cute blog, I'm now a follower :)
Heather
http://madrona-studio.com
http://madronastudio.etsy.com